Life-sized photos of your kids - Engineering prints
I have a large open space in our entryway on the wall and I wanted something simple that involved my little loves and their smiling faces. So why not put a giant photo of each of them on the wall?
In our old home, I did this exact same thing in our living room with my kids/dogs.
Here they are! Beautiful, smiling and all for under $100! This project is super simple and can be done in a day if you wanted to.

So, here’s how it all went down. Errr, up!
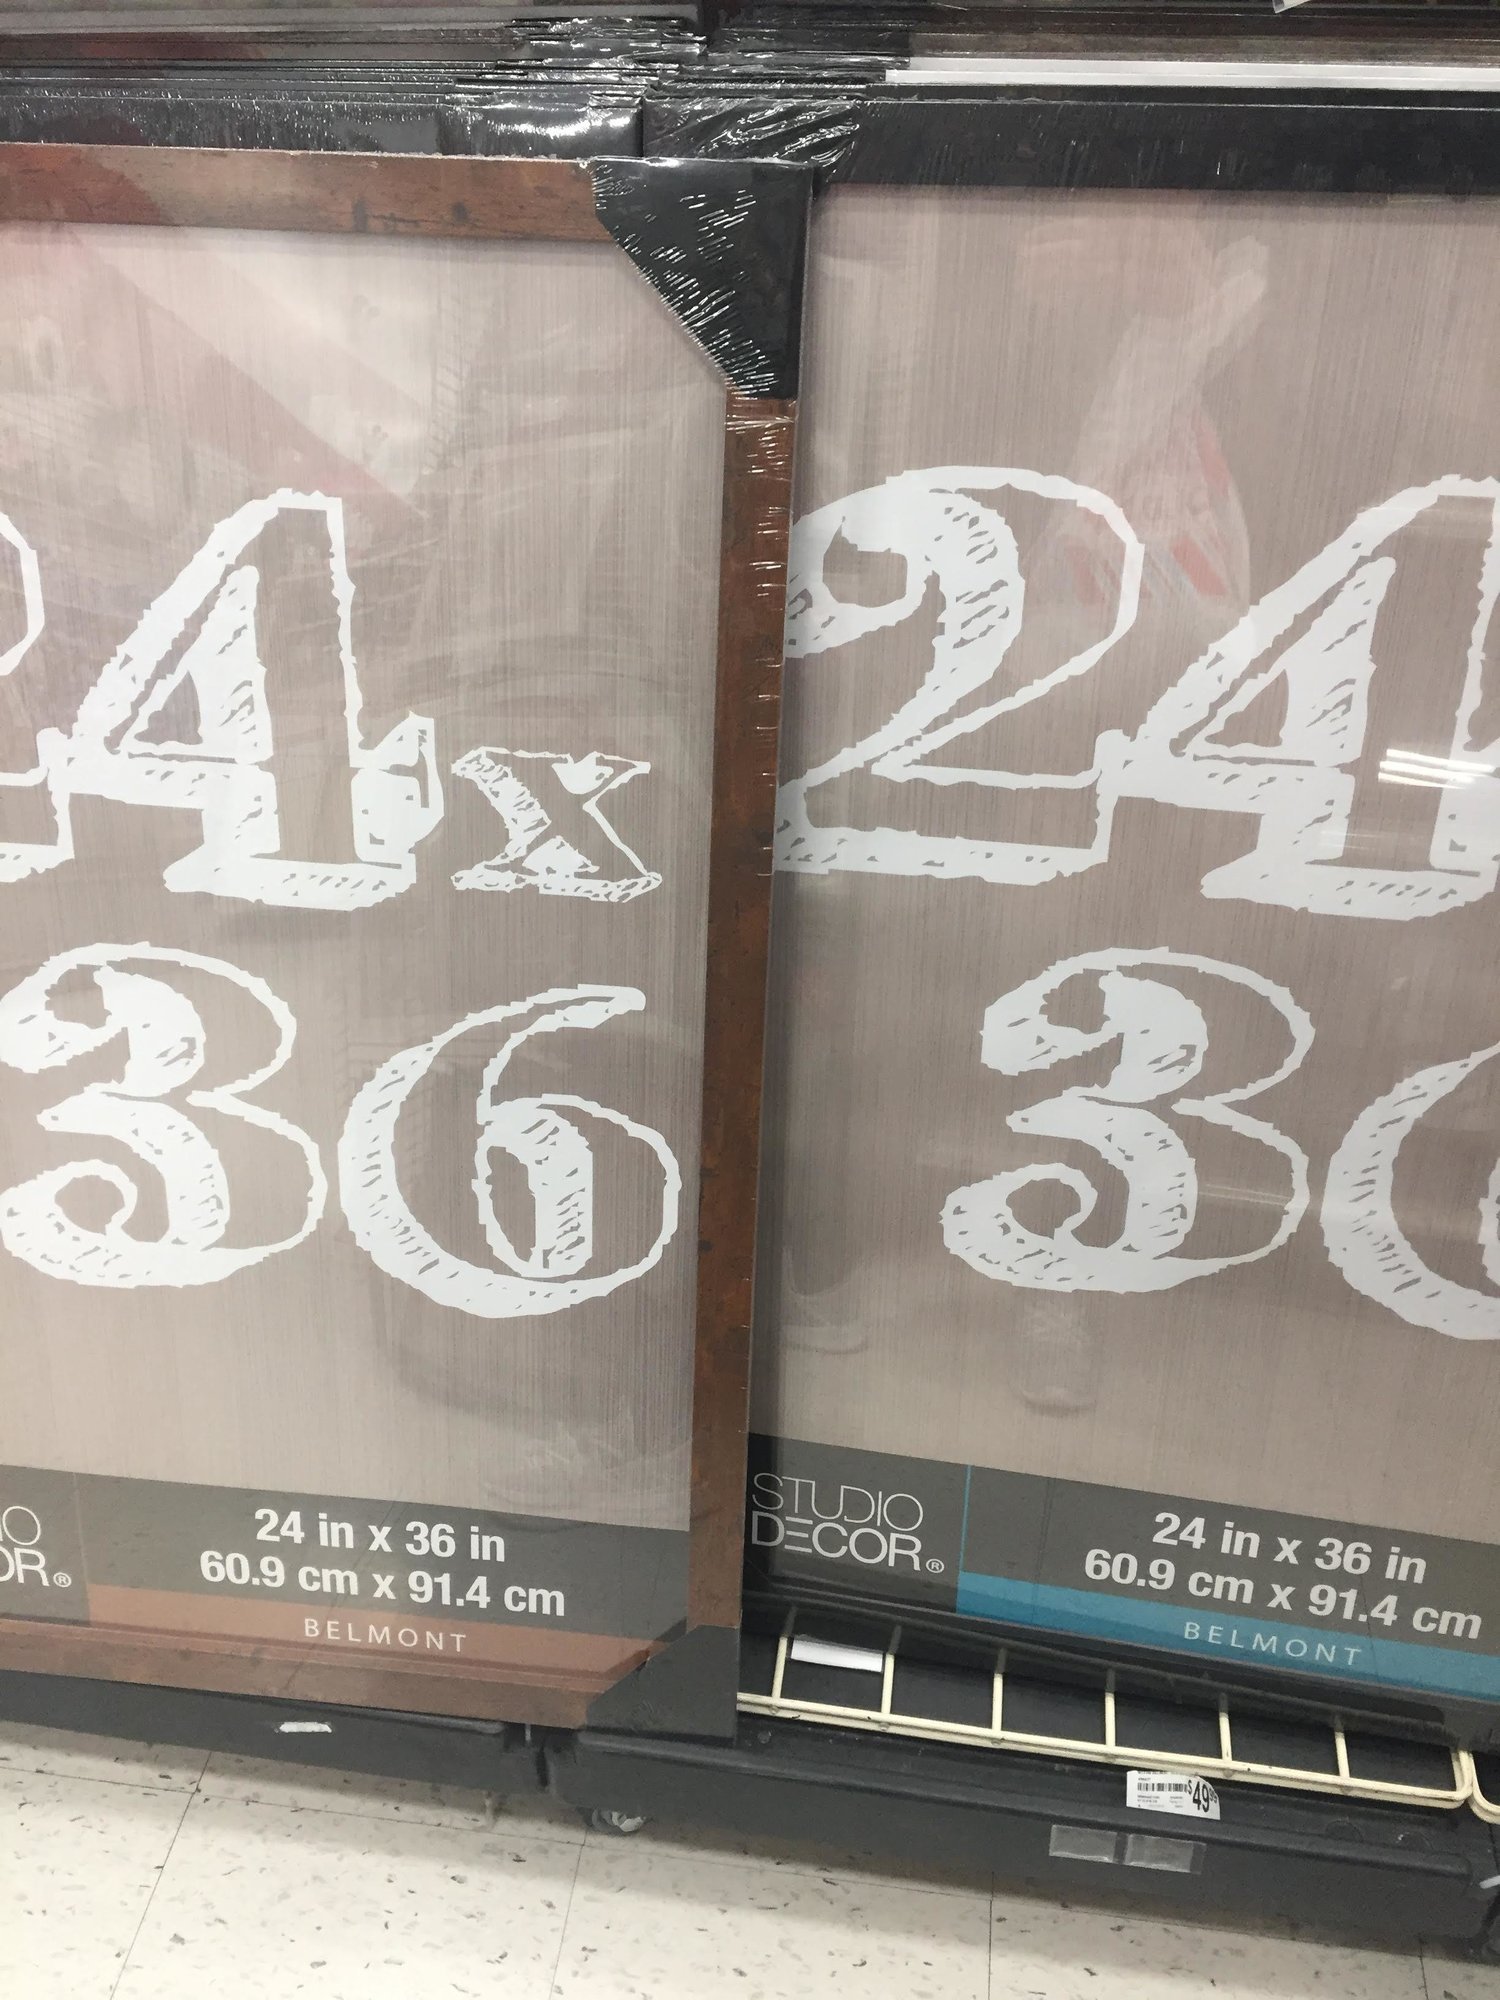
I spent roughly $60 on the frames. They are 24x36 photo frames from Michaels. They had wood, black and white, but I liked the warmth of the wood tone for my living room. I will link the ones I bought and some similar frames I considered below. I’m going to use the exact frames for our entryway in our new home.
Since I wanted 3 frames to go across my wall, I needed 3 different photos to go in them. Here’s the process for the photos.
A light, plain background is best for the engineering prints. These prints are low quality, which is why they are inexpensive to print, so creating a simple background will help keep your image looking nice.
I put our daughter in front of a well lit wall, and took a million photos of her smiling. Here’s the original photo straight from my phone and the one that I sent to the printer.

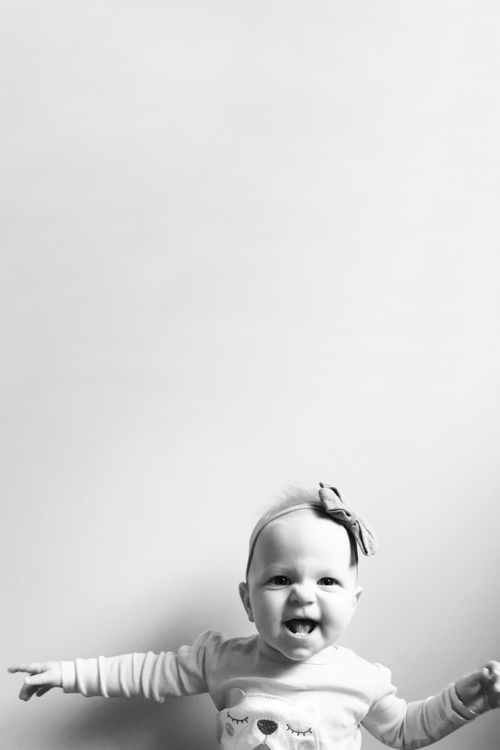
3. Because I wanted the photo to be simple, I opened the photo in Photoshop and cropped the picture so she was toward the bottom, with a lot of white space above her (this is a design style preference).
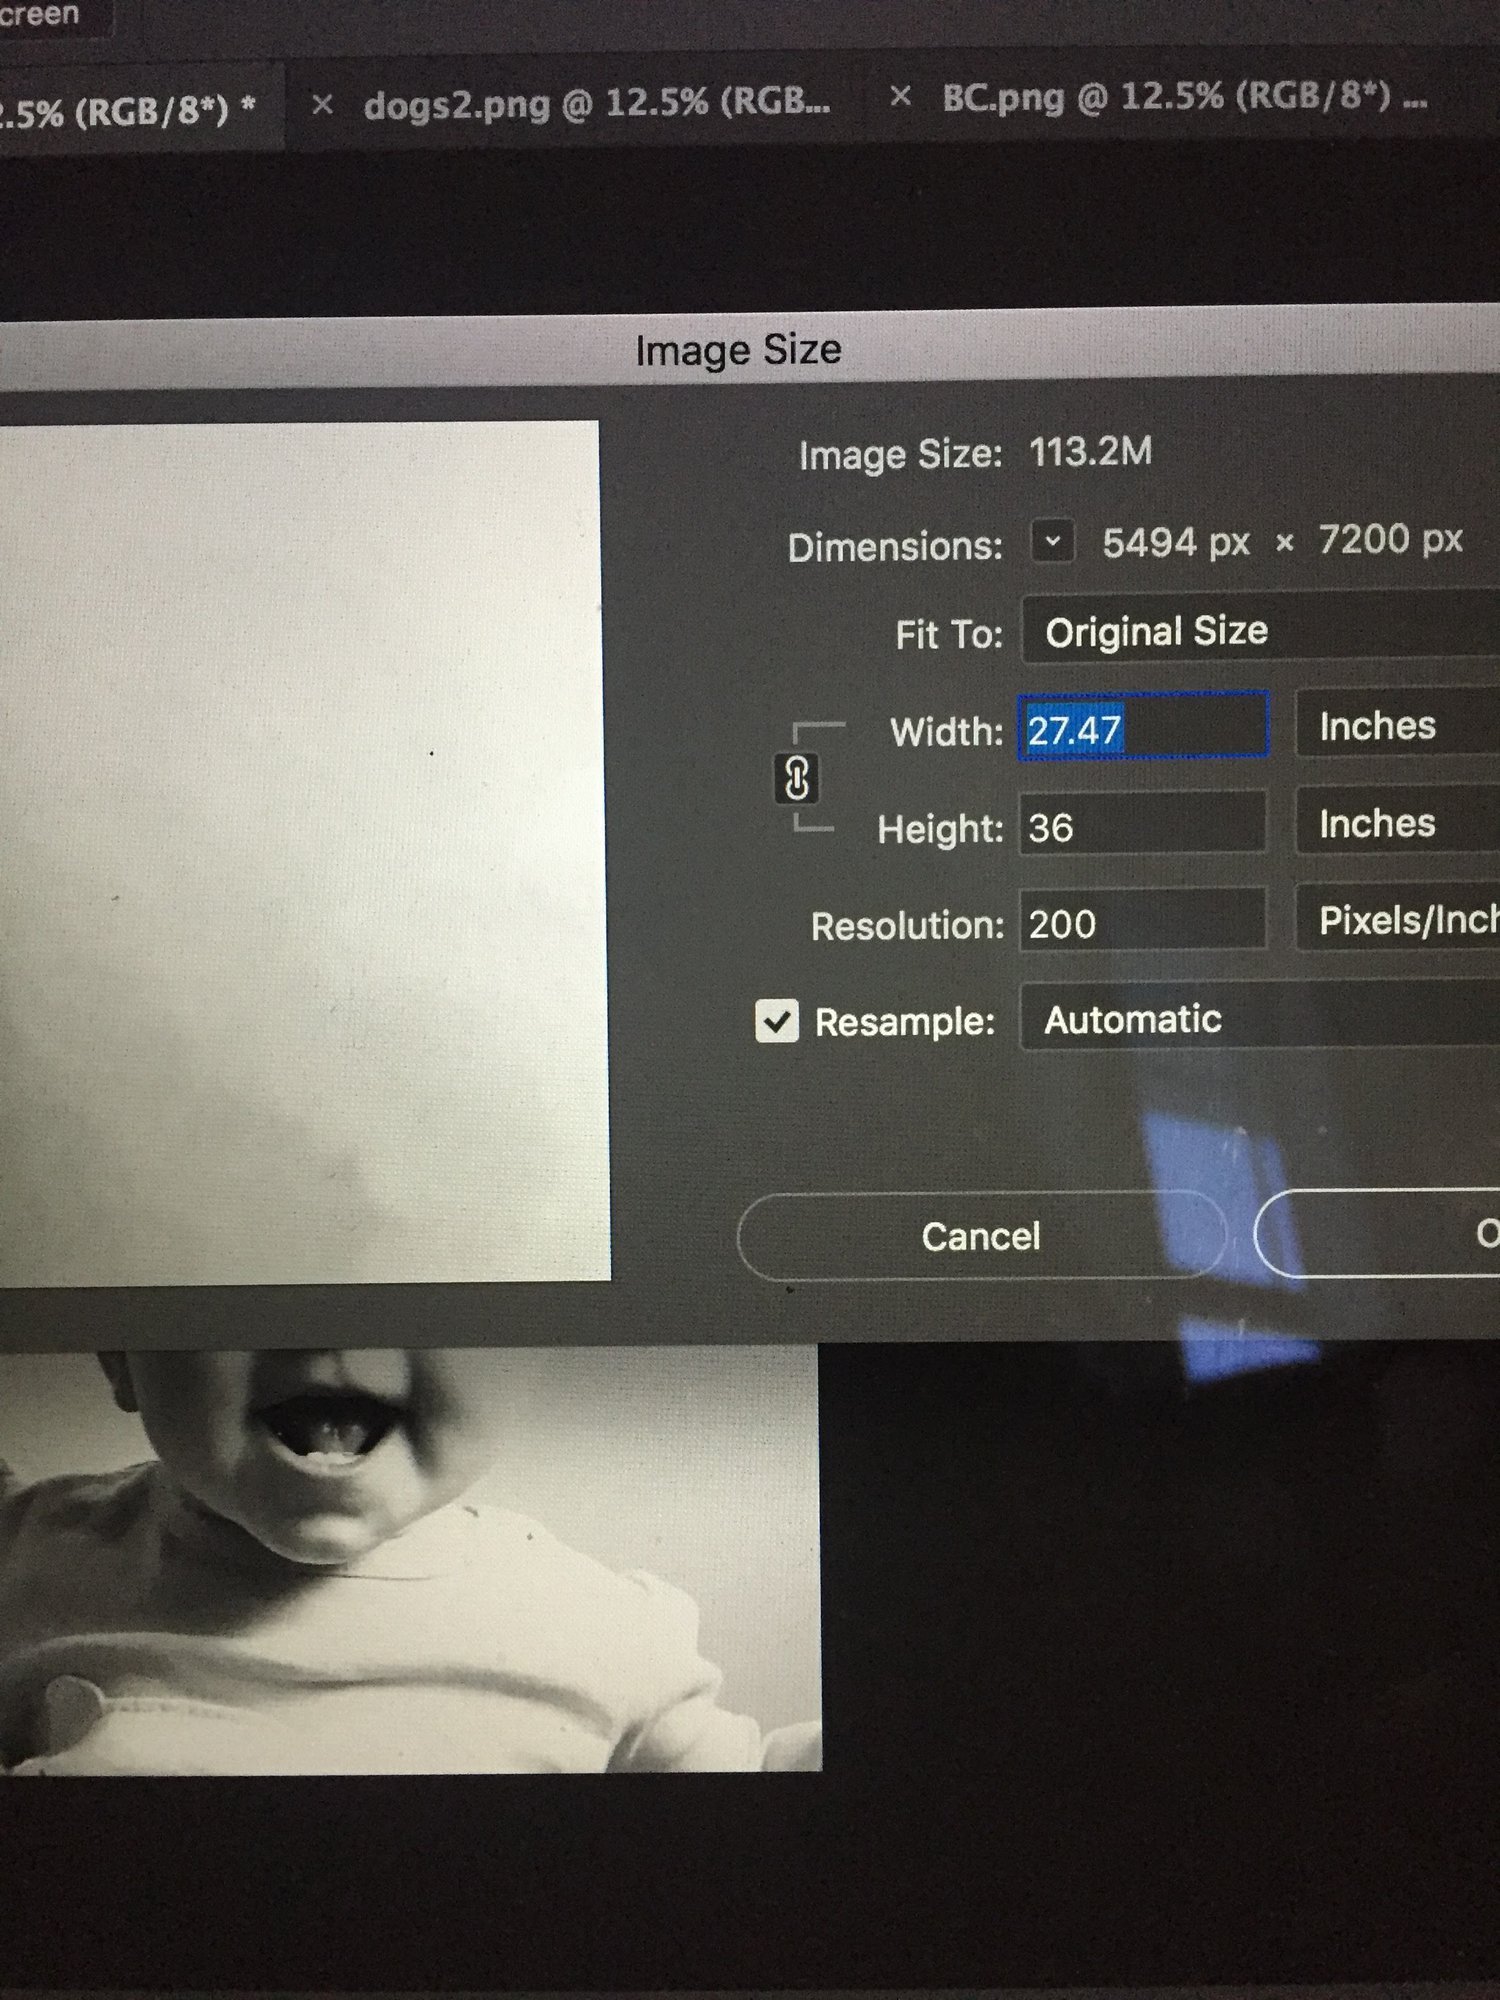
4. I then made it black and white and bumped up the brightness. I also made sure my photo was 24x36 and bumped the resolution to 200.
5. (If you have a different way of editing photos and removing the background, you can use whatever software you have to create the printable image.)
6. Save the files as a PDF!


Once you have your photos ready, you’ll need to find a place to print them. I originally called our local Staples, however, they told me they would not print a ‘photo’ as an engineering print and that I would have to pay $30 or more for a poster print. I didn’t want to pay $30 and I didn’t want a poster print, so I called a few other places. I ended up printing them at our local FedEx store for roughly $5 a print.
I’m really happy with how they turned out. Remember, these are NOT going to be high quality photos. I was going for the ‘printed’ black and white look and I wanted this project to be cost effective. A high quality photo printed at this size is roughly $65 a photo.
Also, the paper is super thin, so be careful when handling them. You’ll want to be sure your frame has a backing, otherwise you will want to mount the print to a foam board.

(sunglasses to protect the privacy of my kiddos.)
Want to keep up with the latest projects at Courtney Lawrences Studio? Subscribe below and get 6 FREE tips for a beautiful home!